The Chalk Line Putting Drill

Precision and aim are so crucial with putting. Often times, where we think we are aiming is in fact not even close to where we are actually aiming. This drill is designed to help you consistently set the putter face squarely to your intended target and to help you roll the ball online.
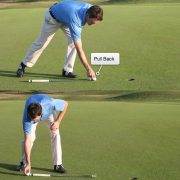
Start by finding a perfectly straight putt on the practice green. This can be done by rolling a number of putts and watching whether they curve to the left or to the right. Once you have found your straight putt, attach the end of the chalk line behind the center of the hole, perhaps using a golf tee. Stretch the chalk line 8 to 10 feet down the line of your straight putt. Pull the line taught, press against the ground, and snap the line a couple of times to mark a straight line on the green.
This represents a perfectly straight line for a perfectly straight putt directly to the middle of the hole. Start with a short putt of 3 or 4 feet, and place the ball on the chalk line. As you set the putter behind the ball, use the chalk line as a guide to ensure that the club face is square. The line will also be helpful as you align your body. Stroke the putt by bringing the club straight back and straight through down the target line. With each putt, step out of your posture and set up once again from scratch. This will help you internalize the setup and alignment process. As you feel appropriate, back away from the hole, rolling progressively longer putts in the same way.


